
Shopping Cart
There are no more items in your cart
- News
- 0 likes
- 4 views
- 0 comments
Bearing installation is one of the most critical maintenance tasks in any industrial plant, directly determining operational reliability and machinery lifespan. Even a premium component will fail prematurely if mounted using incorrect force paths, seated onto damaged shafts, or contaminated during assembly.
Premature failures typically manifest as elevated operating temperatures, abnormal acoustic noise, severe vibration peaks, and early seal degradation. These issues cascade into costly, unscheduled production shutdowns.
This practical step-by-step guide outlines a standard industrial procedure for bearing installation. It provides plant managers, maintenance technicians, and procurement specialists with a repeatable, reliable framework for consistent field outcomes.
Standardizing procedures across maintenance shifts eliminates improvisations and ensures assets run efficiently through their full design life.
Machinery subjected to angular deflection, structural distortion, or heavy shock loads relies on robust spherical plain bearings to accommodate multidirectional articulation without binding.
Why Bearing Installation Fails Early
Most premature bearing failures do not stem from material flaws or factory defects. In modern industrial operations, the vast majority originate from improper installation practices and poor workshop cleanliness.
A bearing is an ultra-precision mechanical assembly featuring microscopic surface finishes and exacting internal clearances. Applying raw impact force directly to rings or transmitting mechanical press loads through rolling elements causes immediate raceway denting.
Grit, moisture, or chemical residues trapped within the raceways during assembly act as destructive grinding compounds under operational loads.
These installation errors rarely cause instant catastrophic failure upon startup. Instead, initial surface distress develops silently over hours or days under load, accelerating raceway spalling and cage destruction.
Pre-Installation Preparation and Cleanliness
High-reliability bearing maintenance begins well before mechanical components are positioned on the workshop bench. Preparation, workspace organization, and environmental cleanliness are vital prerequisites for long service life.
Workstations must be clean, dry, well-illuminated, and shielded from airborne debris, grinding dust, and draft airflow. Technicians should never expose unwrapped bearings near active fabrication or abrasive blasting areas.
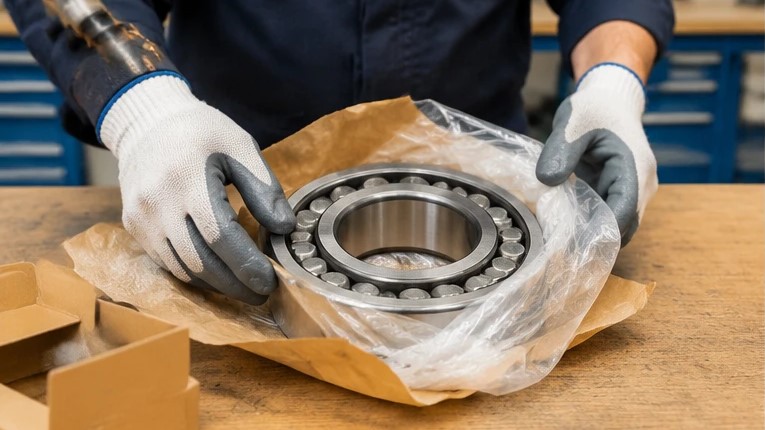
Always retain new bearings in their original, unopened protective packaging until the exact moment of physical installation. Pre-greased or coated bearing surfaces rapidly attract particulate contamination if left exposed on open worktables.
Inspect accompanying components including snap rings, locknuts, lockwashers, adapter sleeves, and dynamic seals. Missing or damaged accessories frequently tempt technicians into makeshift assembly shortcuts that compromise the entire machine.
High-capacity roller bearings, including cylindrical, tapered, and spherical roller types, demand meticulous axial clearance adjustment and precise housing alignment to avoid edge loading.
Essential Industrial Installation Tools
- Calibrated micrometers, bore gauges, and dial test indicators for precision dimensional verification
- Dedicated mechanical mounting tool sets, impact fitting rings, and sleeve sleeves
- Temperature-controlled induction heaters equipped with magnetic thermal sensors
- Calibrated torque wrenches, certified hydraulic pullers, and proper mounting fluid injectors
- Lint-free workshop cleaning wipes, residue-free degreasing solvents, and clean heat-resistant gloves
Step 1: Inspect and Measure Shaft and Housing Fits
A replacement bearing cannot compensate for an out-of-tolerance shaft journal or a worn housing bore. Installing a precision bearing onto a damaged foundation guarantees rapid operational failure.
Thoroughly inspect the shaft seat, housing bore, shoulders, and transition fillets. Check carefully for signs of fretting corrosion, previous thermal scoring, deep gouges, raised burrs, and rust pitting.
Remove minor burrs or localized surface imperfections using an extra-fine abrasive stone, taking extreme care not to remove parent metal from the precision seat. Clean all mating components with an evaporating solvent and wipe dry.
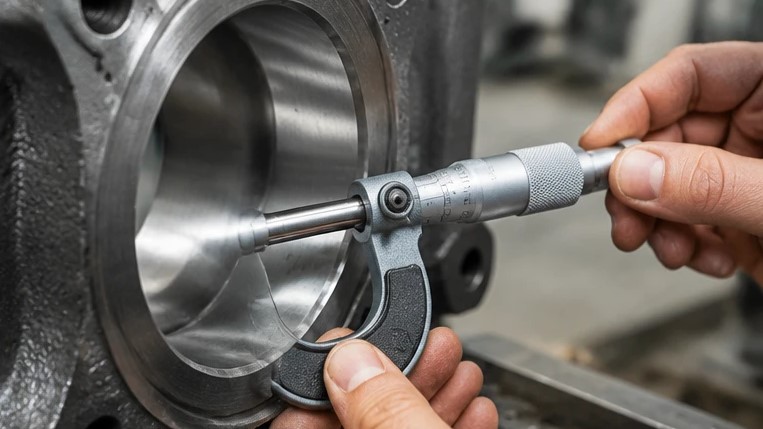
Accurate measurement is non-negotiable. Measure the shaft diameter across multiple radial positions and along the entire axial length of the seating journal to check for ovality and taper.
Repeat this procedure on the stationary housing bore using an internal micrometer or calibrated dial bore gauge. Compare every recorded dimension against the engineering drawing and bearing fit recommendations.
Excessive interference fit expands the inner ring excessively, eliminating crucial radial internal clearance and causing rapid overheating. Conversely, loose fits allow ring creeping, fretting corrosion, and severe structural vibration.
Step 2: Select the Correct Mounting Method
Mounting methods are determined by bearing size, envelope geometry, internal clearance class, and fit severity. Selecting the wrong method introduces severe mechanical stress into components.
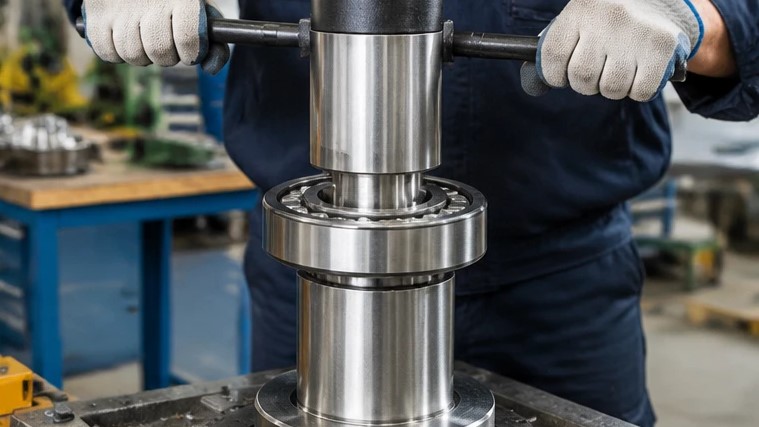
Cold mechanical mounting is strictly reserved for smaller bearings with light interference fits. This process relies on specialized impact rings and sleeves engineered to distribute mounting force evenly across the press-fitted ring.
Heat mounting represents the standard, reliable practice for medium-to-large bearings fitted onto cylindrical or tapered shaft journals. Controlled thermal expansion allows the inner ring to slide smoothly into place without force.
Hydraulic mounting methods, including hydraulic nuts and high-pressure oil injection, are used for heavy-duty industrial machinery, tapered seats, and large extraction sleeves.
Technicians must avoid open flame torches or hot oil baths. Torches create localized hot spots that destroy steel metallurgy, while oil baths carry high burn hazards and contamination risks.
Step 3: Proper Force Application
The fundamental mechanical rule of bearing assembly is straightforward: never transmit mounting force through the rolling elements.
When mounting a bearing onto a cylindrical shaft with an interference fit, pressing force must be applied strictly and squarely to the inner ring face. Transmitting force via the outer ring causes rolling elements to indent the raceway.
When mounting a bearing into a stationary housing with a tight bore fit, apply driving force exclusively to the outer ring face.
Improper force distribution causes microscopic brinelling marks on precision raceways. Under rotation, these indentations generate excessive noise, high friction, and rapid subsurface fatigue.
Standard deep groove ball bearings support moderate radial and light axial loads at high rotational speeds, but their internal clearance can be compromised by excessive interference fits.
Step 4: Step-by-Step Induction Heating Execution
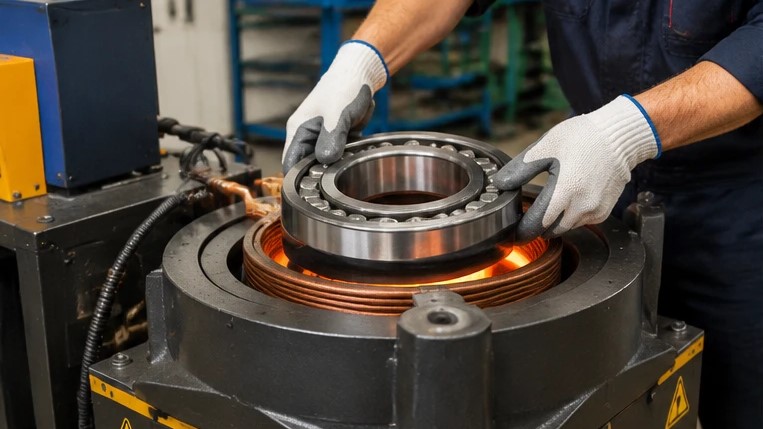
Controlled induction heating represents the safest, cleanest, and most precise thermal expansion method in modern maintenance facilities.
Position the clean bearing horizontally or vertically on the induction heater core, securing the magnetic temperature sensor to the inner ring bore. Heat the bearing uniformly to the specified target temperature, typically around 110 degrees Celsius (230 degrees Fahrenheit).
Never heat a standard bearing beyond 120 degrees Celsius (250 degrees Fahrenheit), as excessive temperatures alter metallurgy, soften precision raceways, and degrade internal factory grease.
Once the target temperature is reached, immediately slide the expanded bearing smoothly along the shaft journal until it contacts the locating shoulder firmly.
Hold or clamp the bearing axially against the shaft shoulder until it cools and shrinks securely into position. As bearings cool, they contract axially as well as radially; failing to hold them tight against the shoulder leaves a gap that causes shaft misalignment.
Standardized Bearing Installation Practices
Implementing a structured protocol ensures that every mechanical installation adheres to rigorous reliability criteria.
| Installation Stage | Recommended Practice | Prohibited Action |
|---|---|---|
| Component Handling | Keep packaging sealed until final mounting; handle using clean, dry protective gloves. | Exposing bare bearings on dusty benches or handling them with soiled hands. |
| Journal Preparation | Measure seats across multiple axes; stone down raised burrs; clean with fast-evaporating solvent. | Forcing bearings onto scored, out-of-round, or unmeasured shaft journals. |
| Mechanical Pressing | Direct pressing forces strictly against the ring experiencing the interference fit. | Striking rings directly with standard steel hammers or pressing across balls/rollers. |
| Thermal Expansion | Utilize automated induction heaters with magnetic thermal monitoring limits up to 110°C. | Heating components using open gas torches, direct burners, or contaminated oil baths. |
| Shaft Retention | Fasten locknuts using calibrated torque tools; secure lockwasher prongs properly into slots. | Over-torquing locknuts with chisel impacts or reusing cracked, fatigued locking washers. |
| Commissioning | Perform initial low-speed run checks while logging baseline temperature and vibration data. | Operating machinery instantly under full load without preliminary verification runs. |
Step 5: Mounting Housings and Specialized Units
Housings, plummer blocks, and self-contained assemblies require distinct procedures to prevent operational distortion and internal binding.
Inspect housing split surfaces, end covers, and internal locating rings for particulate debris. Ensure housing mounting feet rest on a flat, coplanar foundation to prevent structural flexing when holding bolts are torqued down.
When assembling pre-mounted assemblies such as industrial bearing units, verify that the base mounting bolts are torqued evenly before securing shaft locking collars, setscrews, or eccentric rings.
Tightening shaft lock collars before securing the housing base induces severe internal preloading, producing excessive operating friction and early bearing distress.
In severe operating conditions requiring non-conductive properties, exceptional thermal resistance, or extreme speed capabilities, modern ceramic bearings deliver outstanding performance, provided they are mounted with zero impact stress.
Step 6: Contamination Control and Initial Lubrication
Contamination control during assembly directly governs operational reliability. A significant percentage of all industrial bearing failures stem from particulate ingress during maintenance.
Wipe down shaft shoulders, seal cavities, and housing interiors using clean, lint-free technical rags. Ensure that protective labyrinth and elastomeric contact seals are lubricated and oriented correctly during installation.
If mounting open bearings that require manual greasing, pack the rolling elements and raceways completely with the specified grease before closing the housing. Fill the housing cavity according to engineering guidelines, usually between one-third and one-half of its total volume.
Overfilling bearing housings with grease causes high churning resistance, leading to rapid thermal runaway and grease degradation.
Procuring certified, high-grade components is essential for reliable uptime. Partner with AlmaBearings to source precision-manufactured components engineered to deliver maximum operational longevity under severe industrial operating conditions.
Step 7: Post-Installation Alignment and Mechanical Checks
Once mechanical mounting is complete, verifying drive system alignment is mandatory before restoring machinery to service.
Coupling misalignment, angular runout, and parallel offset introduce destructive cyclic bending loads onto bearing assemblies. Use precision laser alignment tools or dial indicators to align driving and driven shafts within specified tolerances.
Rotate the shaft assembly by hand whenever mechanically possible. The rotating assembly should turn smoothly, quietly, and evenly without resistance, tight spots, or grinding sensations.
Verify that all locknuts, retaining plates, base bolts, and auxiliary fittings are torqued to specified values and mechanically locked into position.
Step 8: Commissioning and Initial Run-in
The initial commissioning run represents the best opportunity to detect subtle assembly defects before catastrophic failure occurs.
Start the machine under zero or reduced load where possible, gradually bringing it up to operating speed. Closely observe acoustic signatures and monitor initial bearing housing temperatures.
During initial run-in, grease lubricated bearings typically display a transient temperature rise as excess grease is purged away from the rolling elements. Once grease distribution stabilizes, operating temperatures drop to a steady equilibrium.
If temperature rises continuously without leveling off, or if sharp vibration spikes appear, shut the machine down immediately to investigate internal clearance, lubrication volume, and alignment.
Record baseline vibration spectra, acoustic ultrasound levels, and infrared thermal images. These baseline measurements serve as the reference standard for all future condition-monitoring assessments.
Installation Nuances Across Bearing Classifications
Different bearing configurations possess unique mechanical characteristics that require specialized assembly considerations.
Critical Pre-Commissioning Verification Checklist
- Measure and log shaft journal and housing bore dimensions against tolerance charts
- Confirm clean component handling and dedicated mounting sleeve force paths
- Inspect dynamic oil seals, grease flinger rings, and labyrinth paths for smooth clearance
- Apply the exact manufacturer-specified grease grade and calculated volume
- Verify precision coupling alignment using calibrated laser measurement instruments
- Check hand-rotation freedom and record initial baseline vibration and temperature data
Sourcing and Long-Term Reliability
Standardized installation practices must be supported by dependable component sourcing and technical engineering support.
Selecting the correct internal clearance class, seal material, and cage design prevents assembly complications and premature downtime across demanding processing lines.
Consult with the engineering specialists at AlmaBearings to select the ideal bearing architecture, mounting accessories, and maintenance strategies tailored to your plant operating parameters.
Establishing repeatable mounting workflows, training technicians in precision fitting, and using top-tier components ensures long equipment life, low maintenance costs, and maximum plant productivity.
Selecting the correct design family—whether standard deep groove ball bearings units or specialized cylindrical roller bearings—is critical to achieving designed service intervals across heavy industrial machinery.
Frequently Asked Questions
1. Can an industrial bearing be installed using a standard workshop hammer?
Never strike a bearing ring directly with a steel hammer. Uncontrolled impact shocks cause brittle fracture, micro-cracking, and raceway brinelling. Always use specialized impact fitting sleeves, mechanical arbor presses, or controlled induction heaters.
2. What is the maximum safe temperature for induction heating a bearing?
The standard maximum heating limit for rolling element bearings is 120 degrees Celsius (250 degrees Fahrenheit). Heating beyond this threshold softens heat-treated bearing steel, alters internal dimensions, and degrades pre-packed internal lubricants.
3. Why do bearings experience temperature spikes immediately following installation?
A temporary temperature rise is normal for grease-lubricated bearings as the churning rolling elements purge excess grease into housing reservoirs. The temperature should stabilize after several hours; persistent overheating indicates over-greasing, tight fits, or severe misalignment.
4. How do I determine whether force should be applied to the inner or outer ring?
Always apply force directly to the ring that has the interference press fit with its mating component. Apply force to the inner ring when pressing onto a shaft, and to the outer ring when pressing into a housing bore.
5. Should anti-seize paste be used on bearing journals prior to mounting?
Standard anti-seize compounds containing solid metallic particles should not be applied to precision interference fits because they alter calculated seating tolerances. Use thin, approved mineral mounting oils that facilitate smooth seating without corrupting precision fits.
Comments (0)