
Shopping Cart
There are no more items in your cart
- News
- 0 likes
- 6 views
- 0 comments
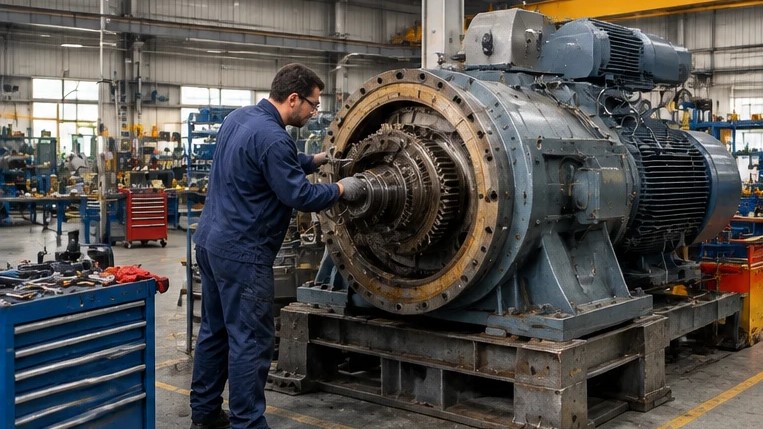
Bearing removal is a critical phase of the industrial maintenance lifecycle that is frequently undervalued compared to installation. While many technicians view extraction as a destructive process purely for component replacement, safe removal is essential for root cause failure analysis (RCFA) and preventing damage to the surrounding shaft and housing.
When a bearing is removed using improper tools or excessive, uncontrolled force, the shaft journals and housing bores often sustain permanent scoring or distortion. These secondary mechanical injuries create a cycle of recurring failures, as the new replacement bearing will never seat correctly on a compromised surface.
A systematic, safety-first approach to bearing removal ensures that expensive rotating machinery components remain in serviceable condition. It also protects maintenance personnel from the high-energy mechanical risks associated with hydraulic pullers and thermal extraction methods.
This comprehensive guide outlines professional industrial protocols for bearing extraction, focusing on protecting the shaft, the housing, and the integrity of the maintenance environment.
Contact the engineering team at AlmaBearings to discuss your specific machinery requirements, from heavy-duty extraction tools to premium replacement components designed for long-term industrial durability.
The Economic Importance of Safe Extraction
Industrial facilities often incur significant financial losses not just from the cost of the bearing itself, but from the collateral damage caused during removal. A shaft that requires machining or metal-spraying because of a botched extraction represents thousands of dollars in unplanned repair costs and extended downtime.
By standardizing bearing removal procedures, plant managers ensure that assets are handled with the same level of precision during disassembly as they are during assembly. This consistency reduces the total cost of ownership (TCO) and improves long-term mechanical reliability across the plant.
Professional removal also allows for the preservation of the failed bearing for laboratory analysis. Inspecting the raceways and rolling elements of a removed bearing provides vital clues about lubrication adequacy, contamination ingress, and electrical discharge damage.
Without a safe extraction process, these diagnostic clues are often obliterated by hammer marks or torch burns, leaving the root cause of the failure a mystery.
Pre-Removal Inspection and Preparation
Before any physical extraction begins, the maintenance team must conduct a thorough inspection of the machine assembly. Documenting the original orientation, locating positions, and environmental conditions prevents costly errors during the subsequent reassembly phase.
Clean the external surfaces of the machine housing and the exposed portions of the shaft. Removing thick layers of grease, industrial crust, and rust prevents these contaminants from entering the precision fits during the sliding motion of extraction.
Verify the availability of the correct technical documentation and drawing sets. Knowing the exact fit tolerances and the presence of internal shoulders or retaining rings prevents technicians from attempting to pull a bearing against a mechanical obstruction.
Clear the work area of unnecessary clutter and ensure that all specialized extraction tools are inspected for hydraulic leaks, structural cracks, or worn threads. Safety is the primary priority when dealing with the high tensions required to break a press fit.
Safety Protocols for Industrial Bearing Removal
Maintenance personnel must adhere to strict safety guidelines to prevent workplace injuries during extraction procedures. Bearing removal involves significant stored mechanical energy and, in many cases, high temperatures.
Always wear appropriate personal protective equipment (PPE), including impact-resistant eye protection, heavy-duty industrial gloves, and steel-toed safety footwear. If thermal extraction is used, specialized heat-resistant gloves and aprons are mandatory.
When using high-pressure hydraulic pullers or mechanical splitters, always wrap the bearing assembly in a protective safety blanket or heavy cloth. In the rare event of a component fracturing under tension, the blanket contains flying metal shards.
Secure the machine component firmly in a heavy-duty bench vise or on a dedicated disassembly stand. Attempting to pull a bearing from an unstable or poorly supported component increases the risk of the puller slipping and causing severe injury.
Common Challenges in Bearing Extraction
Several factors can make bearing removal difficult, even for experienced technicians. Understanding these challenges allows for the selection of the most appropriate extraction strategy.
Fretting corrosion is a primary obstacle, where microscopic vibrations cause the bearing ring and the shaft to effectively “cold weld” together. This chemical bonding requires significantly higher breakaway force than the original installation pressure.
Accumulated rust and oxidation on exposed shaft journals also impede the sliding path of the bearing. These surfaces must be stone-ground or polished smooth before the bearing is pulled across them to avoid permanent shaft scoring.
In some designs, the bearing is mounted against a high shaft shoulder or inside a blind housing, making it impossible to reach the rear face with standard puller jaws. These scenarios require specialized internal pullers or destructive removal techniques.
Essential Industrial Removal Tools
The quality of the extraction tool directly dictates the safety of the technician and the integrity of the machine. Using makeshift hammers and chisels is never an acceptable practice in modern industrial maintenance.
Recommended Professional Extraction Kit
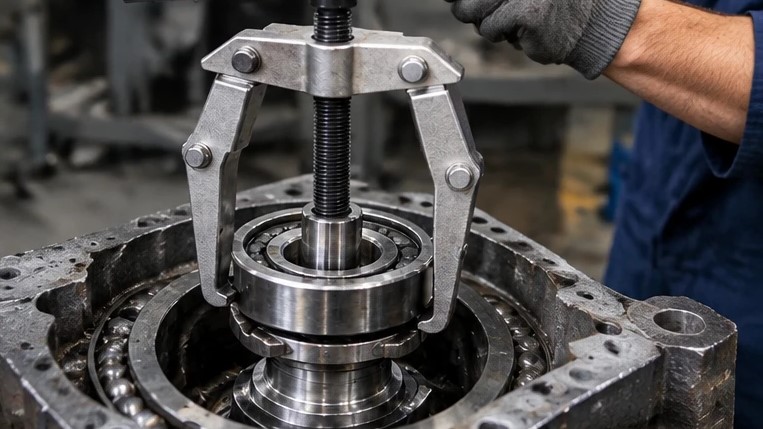
- Mechanical and hydraulic jaw pullers with various reach and spread capacities
- Back-pulling attachments (splitters) that grip the inner ring behind the bearing
- Internal and blind-hole puller sets for bearings mounted within housings
- Induction heaters and thermal rings for rapid expansion of inner rings
- Calibrated hydraulic nuts and oil injection pumps for large-bore assemblies
Selecting the right tool depends on whether the bearing is being removed from a shaft, a housing, or a specialized bearing units assembly.
Step 1: Cleaning and Lubricating the Shaft
The first mechanical step in safe removal is the preparation of the shaft journal ahead of the bearing’s sliding path. Any debris or rust on this surface will act as an abrasive as the bearing is pulled.
Thoroughly clean the shaft using a fast-evaporating solvent and a lint-free wipe. If rust is present, use a fine abrasive cloth or an oil-stone to remove the oxidation until the metal surface is smooth and bright.
Apply a light coating of clean, low-viscosity mineral oil or a specialized penetrating lubricant to the exposed shaft. This lubrication reduces the friction generated as the inner ring slides toward the end of the shaft.
Check for any burrs or mechanical upsets on the shaft caused by previous maintenance or set-screw marks. These must be removed with a fine file or stone to ensure the bearing can pass freely without hanging up.
Step 2: Selecting the Correct Extraction Method
The choice of extraction method is governed by the bearing size, the severity of the interference fit, and the available mechanical access points.
Cold mechanical removal using pullers is the most common method for small to medium-sized ball bearings that are mounted with moderate interference. The puller must be positioned so that the force is applied directly to the ring with the press fit.
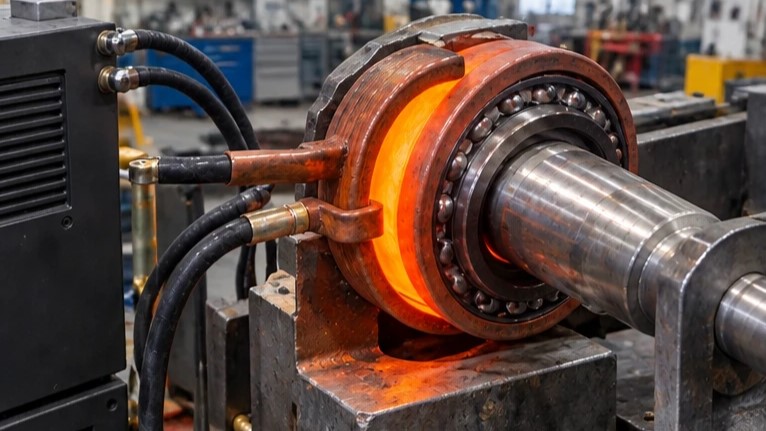
Thermal extraction is used when the interference fit is too tight for mechanical pullers or when there is a high risk of shaft damage. Heating the inner ring rapidly causes it to expand and break the friction bond with the shaft.
The oil injection method is used for large bearings mounted on tapered seats. By pumping high-pressure oil between the mating surfaces, the friction is virtually eliminated, allowing the bearing to be pushed or pulled off with minimal effort.
Step 3: Positioning the Puller for Success
Incorrect puller positioning is a leading cause of damaged shafts and fractured bearing rings. The puller must be centered perfectly to ensure that the extraction force is purely axial.
When removing a bearing from a shaft, the puller jaws should ideally grip the inner ring. If the inner ring is inaccessible, the jaws may grip the outer ring, but this risks transmitting the extraction force through the rolling elements, which is only acceptable if the bearing is being scrapped.
Ensure the puller spindle is perfectly aligned with the center of the shaft. A misaligned spindle applies lateral force, which can bend the shaft or cause the puller jaws to slip off the bearing violently.
Use a spindle protector or a protective centering pad between the puller spindle and the shaft end. This prevents the hardened steel spindle from mushrooming or deforming the shaft’s center hole or threaded end.
Professional Standards for Industrial Bearing Extraction
Following a standardized procedure minimizes risks and ensures that the surrounding mechanical components remain in peak condition.
| Extraction Phase | Recommended Practice | Prohibited Action |
|---|---|---|
| Tool Selection | Use hydraulic pullers for heavy fits; use splitters to grip inner rings directly. | Using standard hammers, pry bars, or welding torches to “cut” bearings off. |
| Load Application | Increase tension slowly and steadily; check for puller alignment continuously. | Applying sudden, violent impact loads to a puller that is already under high tension. |
| Shaft Protection | Use center protectors on the shaft end; polish the sliding path before extraction. | Pushing the puller spindle directly against unprotected shaft threads or centers. |
| Thermal Extraction | Use induction rings or specialized electric heaters for rapid, uniform heating. | Using an oxygen-acetylene torch which overheats the shaft and alters steel properties. |
| Blind Hole Removal | Utilize specialized internal expanding pullers or slide hammers for housing fits. | Attempting to drift a bearing out from the rear using a punch and heavy hammer. |
| Post-Extraction | Clean and inspect the shaft journal and housing bore for wear or fretting immediately. | Leaving the shaft exposed to the environment without protective oil or wrapping. |
Step 4: Applying Controlled Extraction Force
Once the puller is correctly positioned and the safety blanket is in place, begin applying tension. The goal is a steady, controlled movement rather than a sudden release.
If using a mechanical puller, rotate the spindle slowly with a manual wrench. If using a hydraulic puller, operate the pump handle with consistent strokes, monitoring the pressure gauge and the physical movement of the bearing.
Listen for the “crack” or “pop” that indicates the breakaway friction has been overcome. Once the bearing begins to move, continue the extraction at a steady pace without stopping, as a moving bearing is easier to extract than one that has been allowed to settle again.
If the bearing refuses to move despite significant pressure, do not exceed the rated capacity of the puller. Stop and reconsider the method—this is often the moment to introduce heat or oil injection.
For high-precision applications, such as those involving deep groove ball bearings, ensuring a straight, non-tilted extraction path is vital to preserve the shaft’s dimensional accuracy for the next installation.
Step 5: Utilizing Thermal Extraction Techniques
Thermal extraction is the preferred method for removing inner rings of cylindrical roller bearings or other heavy-duty components that have been mounted with a very tight interference fit.
The key to successful thermal extraction is “heat shock”—applying a high volume of heat to the bearing ring so quickly that it expands before the heat can transfer into the shaft. If the shaft heats up and expands along with the bearing, the fit remains tight.
Induction heating rings are the professional standard for this task. They are designed to fit the specific diameter of the bearing ring and provide uniform, rapid heating within seconds.
Once the ring has expanded, it should be removed immediately using heat-resistant gloves or a mechanical puller. Once the ring is off, wipe the shaft clean of any burnt oil or residue while it is still warm.
Step 6: Handling Bearings Mounted in Housings
Removing a bearing from a stationary housing bore presents different challenges, particularly when there is no access to the rear side of the component.
For “blind” holes, use an internal puller with expanding collets that grip the bore of the inner ring or the space between the rolling elements. A slide hammer is then used to provide the axial force required to pull the bearing out.
If the housing is small enough, a mechanical press can be used to push the bearing through the bore. Ensure the housing is supported properly so that the pressing force does not crack or distort the housing casting.
In large industrial roller bearings mounted in split plummer block housings, the removal process is often simplified by removing the housing cap, but the lower half of the bearing must still be carefully rolled out from under the shaft.
Step 7: Post-Removal Inspection and Cleaning
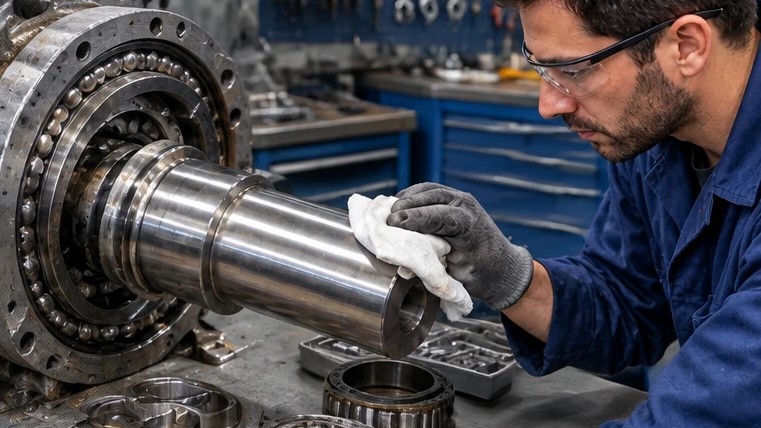
The work is not finished once the bearing is off the machine. The immediate post-removal period is the best time to assess the health of the entire assembly.
Wipe the shaft and housing surfaces clean and inspect them for signs of fretting corrosion, which appears as a reddish-brown or black powder. This indicates that the fit was too loose, allowing the ring to move relative to its seat.
Check for “spinning”—scored rings on the shaft or inside the housing bore. If the seat is damaged, it must be measured and compared to original specifications. If the seat is out of tolerance, the machine must be repaired before a new bearing is installed.
Protect the cleaned surfaces immediately by applying a light coat of rust-preventative oil and wrapping the shaft journals in protective paper or plastic.
For applications requiring high articulation or those operating in extreme environments, such as those using spherical plain bearings, inspect the housing and pin surfaces for any signs of galling or material transfer.
Destructive Removal as a Last Resort
In some extreme cases where a bearing is seized or the geometry prevents tool access, destructive removal may be the only option. This should only be performed by skilled technicians who can avoid damaging the shaft.
The outer ring and cage are typically removed first, exposing the inner ring. The inner ring is then carefully notched using a small abrasive grinder, taking extreme care not to cut through to the shaft.
A cold chisel is then placed in the notch and struck sharply to crack the hardened steel of the inner ring. The resulting crack releases the tension, allowing the ring to be removed easily. This method is high-risk and should be avoided whenever possible.
When working with specialized or sensitive equipment, such as those utilizing ceramic bearings, destructive removal is rarely recommended due to the risk of shattering and the precision of the associated fits.
Sourcing the Right Support for Maintenance
Reliable maintenance outcomes depend on both technical skill and the availability of high-quality replacement components and tools.
A partnership with an experienced supplier ensures that your maintenance team has access to the right bearing configurations, extraction accessories, and technical guidance for challenging removal tasks.
Standardizing your removal and installation procedures with the help of AlmaBearings ensures your plant operates with maximum efficiency and minimum unplanned downtime.
Frequently Asked Questions
1. Why is it bad to use a welding torch to remove a bearing?
Oxygen-acetylene torches provide localized, uncontrolled heat that often exceeds the critical temperature of the shaft steel. This can cause permanent metallurgical softening, warping, or cracking of the shaft, making it unsafe for future use.
2. Can I reuse a bearing after it has been removed?
Generally, no. The forces required for extraction often damage the raceways or seals, especially if force was transmitted through the rolling elements. Only bearings removed with specialized tools for the purpose of inspection, and which show zero signs of wear, should ever be considered for re-installation.
3. What should I do if the puller keeps slipping off the bearing?
Stop immediately. Slipping indicates either a misaligned puller, worn puller jaws, or a fit that is too tight for the current tool. Re-align the puller, use a splitter to get a better grip on the inner ring, or introduce heat to the bearing ring.
4. How do I remove a bearing from a blind hole without a slide hammer?
If a slide hammer is unavailable, some internal pullers can be used with a bridge that rests against the housing face. As the spindle is turned, it pulls the collet (and the bearing) out of the hole axially.
5. Does fretting corrosion mean the shaft is ruined?
Not necessarily. Light fretting can often be cleaned off with an oil-stone. However, if the fretting has removed significant metal, the fit will be too loose, and the shaft must be repaired through metal-spraying or machining a new undersized seat.
Comments (0)